
Queueing enables you to manage how conversations are assigned to agents. In this article, we will illustrate how to use queues.
Default Queue
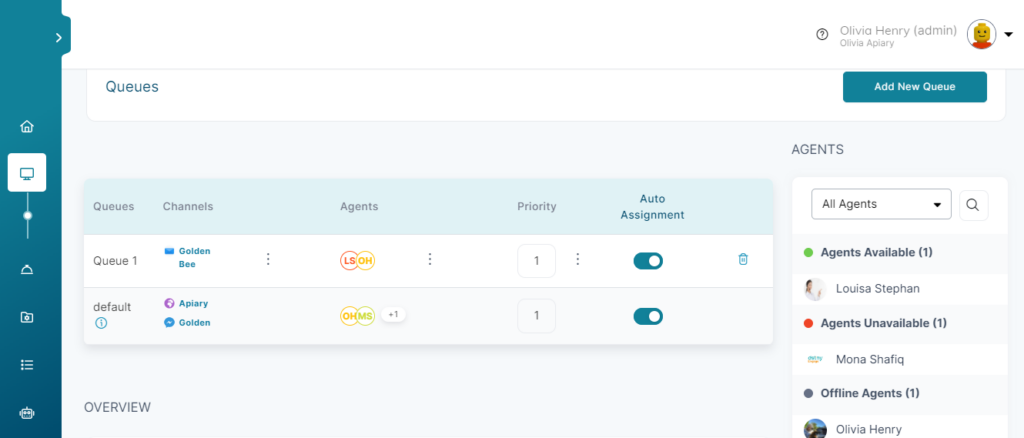
By default, all channels are added to a queue called default, having all agents assigned to it. When a channel is added to a new queue, it is removed from the default queue.
Adding a New Queue
- On the queueing page, click Add New Queue.
- In the Queue Title, write the name that best describes the queue.
- In the Queue Priority, select a value from 1 to 4 (1 is the highest priority). This value helps the router determine which conversations should be assigned to an agent first.
- Type the Queue Description.
- In the Select Channel list, you can add channels you already configured. A channel can only be added to one queue; if you select a channel that is already added to another queue, you will be asked if you’d like to remove it first.
- In the Add Agents list, select the agents you want to assign to this queue. There must be at least one agent in the queue.
- Click Save Changes to add the new queue to your list of queues.
ℹ️ Enable the Auto Assignment if you want conversations to be automatically assigned to agents in this queue.
ℹ️ An alert is shown if all agents in a queue are offline.
Advanced Settings
Agent capacity: By default, an agent can receive unlimited number of conversations. If you enable agent capacity, you can limit the number of conversations an agent can have at one time in their inbox.
Agent-to-agent transfer timeout: Use this to manage how long a transferred conversation should stay at the receiver agent’s incoming conversations before it gets back to the sender.
Realtime Queue Reporting for Supervisors
Queue reporting on workspace performance which includes New Conversations, New Tickets, Avg. Handle Time & Avg. Wait Time.
- Realtime Reports
- Realtime queue report that shows:
- Number of online & all agents on a given queue.
- Number of active & pending conversations on a given queue.
- Longest waiting & longest handling durations of conversations on a given queue.
- Realtime agents report that shows:
- List of assigned queue(s) to an agent.
- Current status of each agent & its duration.
- Number of active & pending conversations, including longest handling time with each agent.
- Realtime queue report that shows:
- Historical / Short-Term Report
- Historical queue report that shows analytics within time span from the last 5 min to last 24 hours:
- No. of assigned agents to each queue.
- No. of Offered, Handled, Missed, and Transferred conversations on each queue.
- Avg. Wait Time & Avg. Handle Time of conversations on each queue.
- Historical agents report that shows analytics within time span from the last 5 min to last 24 hours:
- No. of Offered, Handled, Missed, and Transferred conversations by each agent.
- First Response Time & Avg. Handle Time by each agent.
- Historical queue report that shows analytics within time span from the last 5 min to last 24 hours:
Queue Advanced Configurations for Supervisors
- Agent Capacity
Supervisors now have the ability to set maximum number of conversations to offer to each agent to handle simoustanly.
When agents reach out their max capacity, any new conversations added to the system, then it will wait in the queue till any agent within the same queue is free with less conversations than the capped number on that configuration. - Agent to agent transfer timeout
Supervisors are able to reduce first response time by configuring the “Agent to agent transfer timeout”.
When conversation is an offered to an agent but they don’t join, that conversation will rotate to a different agent to pick it up which reduce average waiting time for customer to receive assistance.