The Email Channel allows you to connect your current email used for customer service to Tactful Unified Inbox using the IMAP (a protocol for managing and retrieving emails from a server) and SMTP (a protocol used to send emails between clients and servers or between servers).
Once you create and configure your email channel, new emails will be shown inside Unified Inbox for agents to handle.
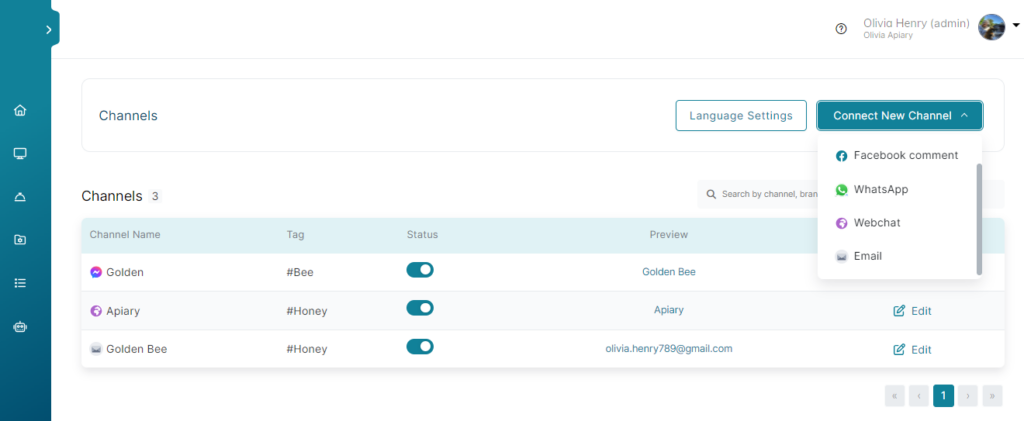
Creating New Email Channel
- On your Workspace left menu, navigate to Administration > Channels.
- Click the Connect New Channel button and choose Email.
- Type the Channel Name and Tag fields, then click Next.
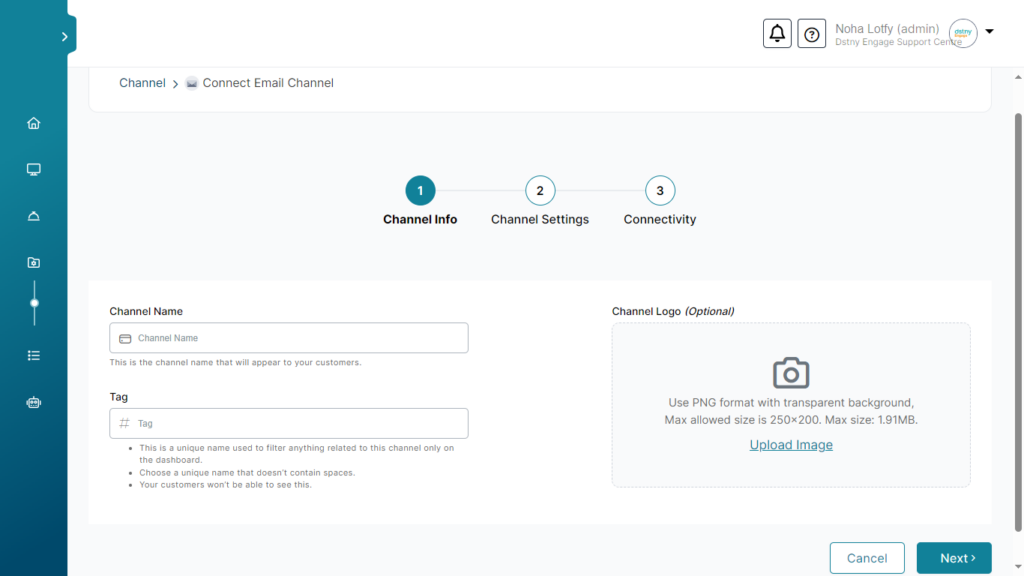
Adding channel Info
Channel Name, Tag, and channel Logo then press Next.
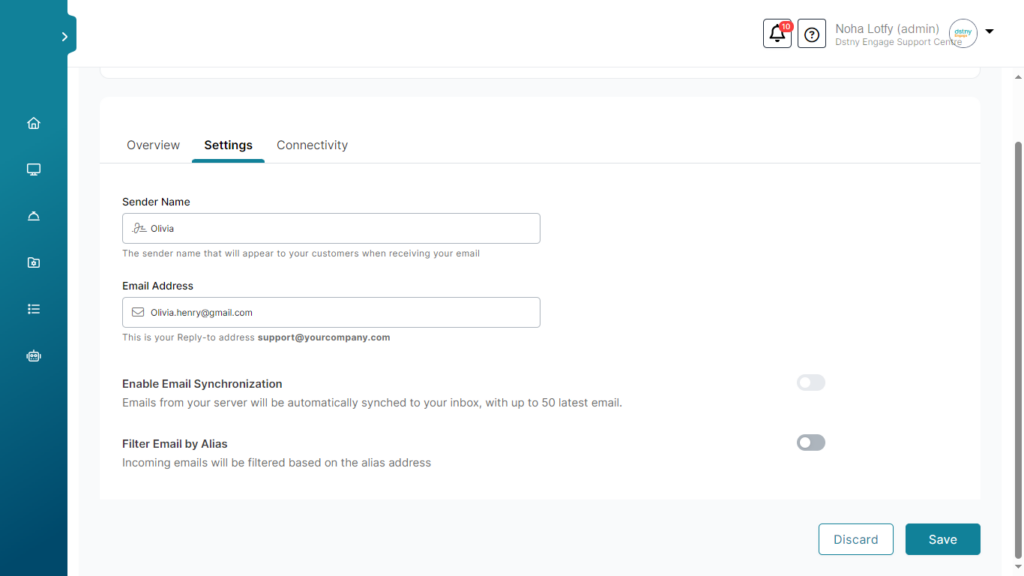
Channel setting
Here you can add the sender’s name that will appear to your customers when receiving your email, and the email address.
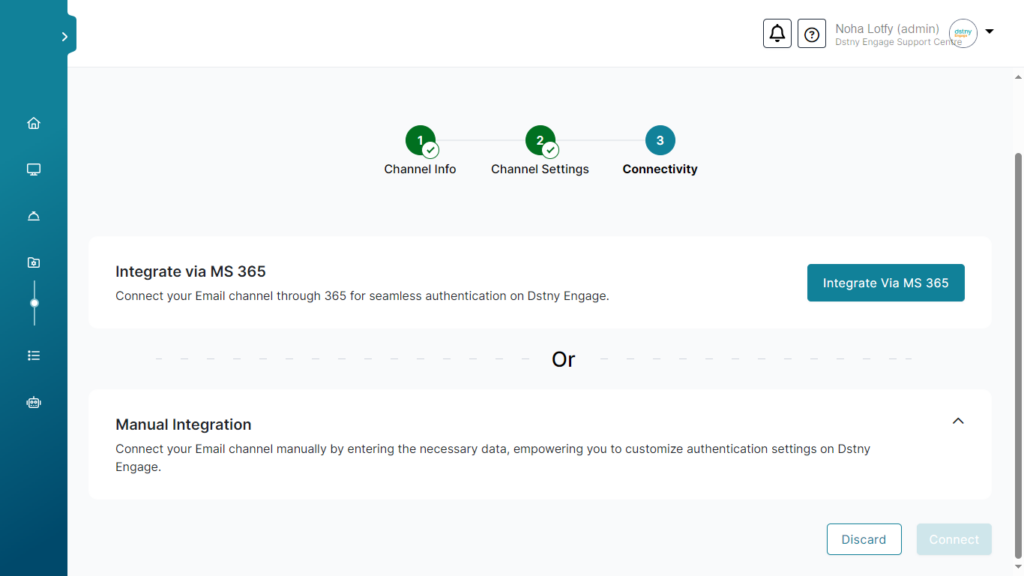
Connectivity
The last step is to connect your email to Tactful, you’ve 2 options:
- Integrate via MS 365: this will automatically redirect you to the OAuth dialogue; the integration process begins so you provide your corresponding Office 365 email credentials (username and password), after authorization process is successfully completed, you will receive confirmation of a successful integration.
- Manual Integration: You can add manually details of IMAP & SMTP to complete configuration.
Configuring Incoming & Outgoing Email Servers “IMAP & SMTP”
Check with your email provider and find the IMAP & SMTP server address, port & email. It is recommended to use the SSL/TLS setup.
- On the Connect Email Channel page, fill in your email provider settings.
- Test your IMAP & SMTP configurations before saving.
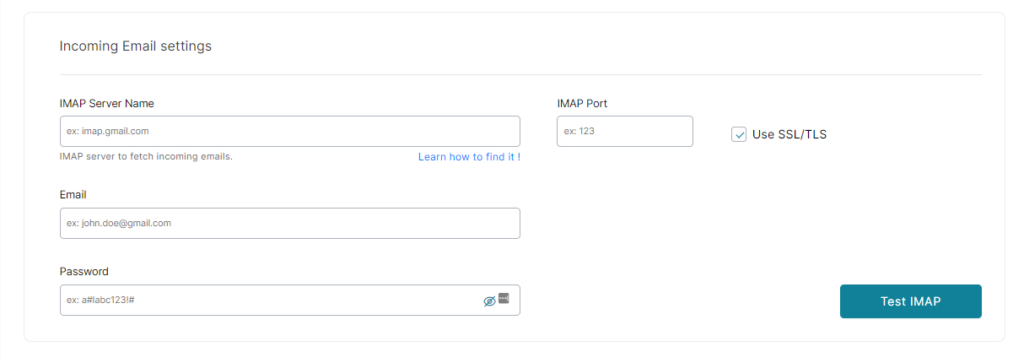
- Make sure that STMP port supports SSL first or you need to uncheck the icon of SSL/TLS.
- Click Connect to complete your setup.
ℹ️ Connecting Email for the first time will retrieve the last 50 emails only.
ℹ️ Shared Inbox is applicable now to be connected by the admin.
ℹ️ Spam messages will not appear in the Unified Inbox.
ℹ️ When you try to connect, make sure to use real emails, avoid “Test”.
How to know the IMAP & SMTP values
Here is a list of IMAP & SMTP configurations from major email providers:
Add email aliases
- In the admin center, go to the Users > Active users page.
- Select the user > Manage username and email.
- Add the new name in the Username field, select a domain and choose AddT then Save changes.
- Wait 24 hours for the new aliases to update in Microsoft 365.
- The user will now have a primary address and an alias. When the user replies, “from address” will depend on the channel email address.
Attachments
- The limit of attachments is 30 MB per message, larger attachments will not be received.
- You can attach more than one file as long as the total size does not exceed 30 MB.
- All file types are supported. For more details check: Using attachments in Unified Inbox.