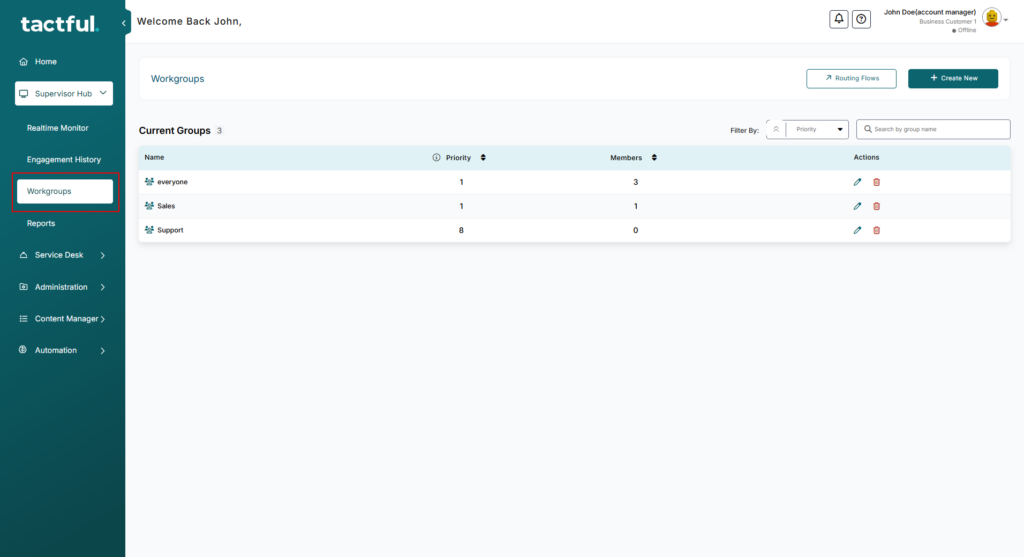
Grouping enables you to manage how conversations are assigned to agents. In this article, we will illustrate how to use workgroups.

Adding a New Group
- On the grouping page, click Create New.
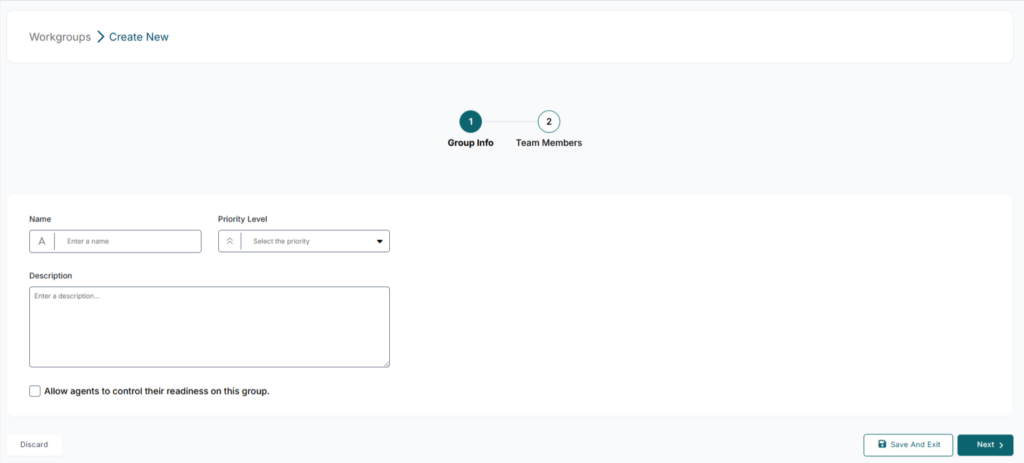
- in the first tab (Group Info)
- In the Group Name, write the name that best describes the group.
- In the Group Priority, select a value from 1 to 10 (10 is the highest priority). This value helps the router determine which conversations should be assigned to an agent first.
- Type the Group Description.
You can check “Allow agents to control their readiness” on this group if you open to member to change his readiness.

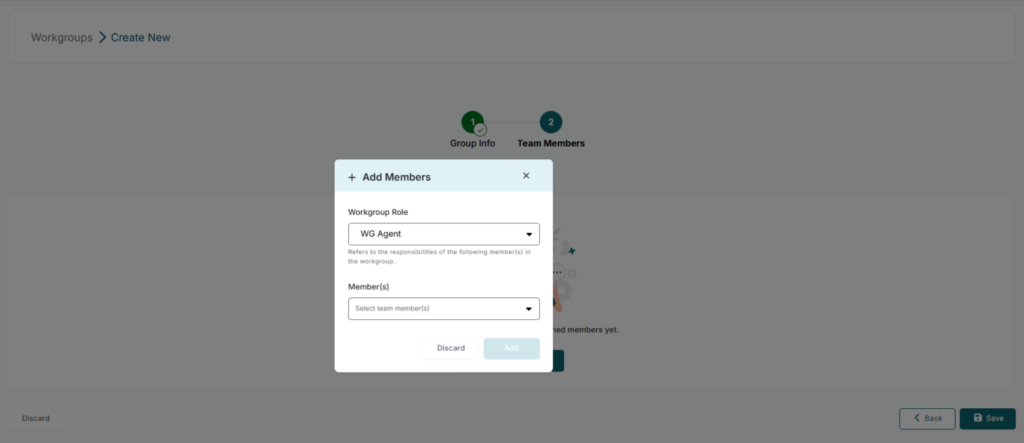
- In the second tab (Team Members)
- On the member tab, click Add Member.
- In the Add Member component list, select the agents you want to assign to this group.
- in the Member Role, select a role of member in the group WG Supervisor or WG Agent.
- in the Member Priority, select a value from 1 to 10 (10 is the highest priority), this value helps the router determine the best agent can handle the conversation.
- in the Member Readiness, open or close the readiness that help router to check if agent focus to handle the conversation on group or not.

Edit Group
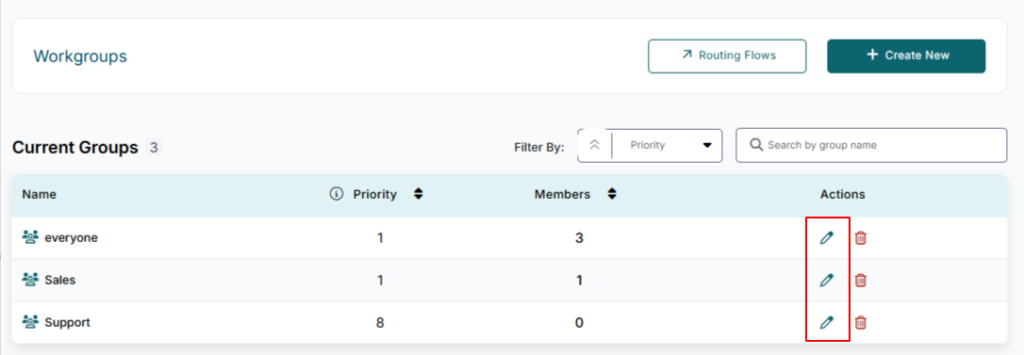
- On the grouping page, click Edit icon On the group record.
- in the first tab (Group Info)
- In the Group Name, Edit the name that best describes the group.
- In the Group Priority, Update value from 1 to 10 (10 is the highest priority). This value helps the router determine which conversations should be assigned to an agent first.
- Edit the Group Description.
- in the Second tab (Team Members)
- On the member tab, click Add Member or Delete Member.
